Subfloor preparation is one of the most important steps in a successful tile floor project. Getting the subfloor ready is the most important part of the job, because if it isn’t done right, the floor could crack. A tile floor can be installed several ways, but be sure to follow local codes and manufacturer’s directions.
Preparing a Wood Subfloor
The first step to preparing a wood subfloor is to create a level surface. Slide a straight edge over the floor in different directions. If you find any uneven spots, mark them so they can be leveled, and sand down the high spots.
Next, fill in seams in the subfloor with caulk. To provide a stable base for the floor tile, cement backer board should be installed on the subfloor first. Measure and cut the backer board to size.
Subfloor Preparation is Important
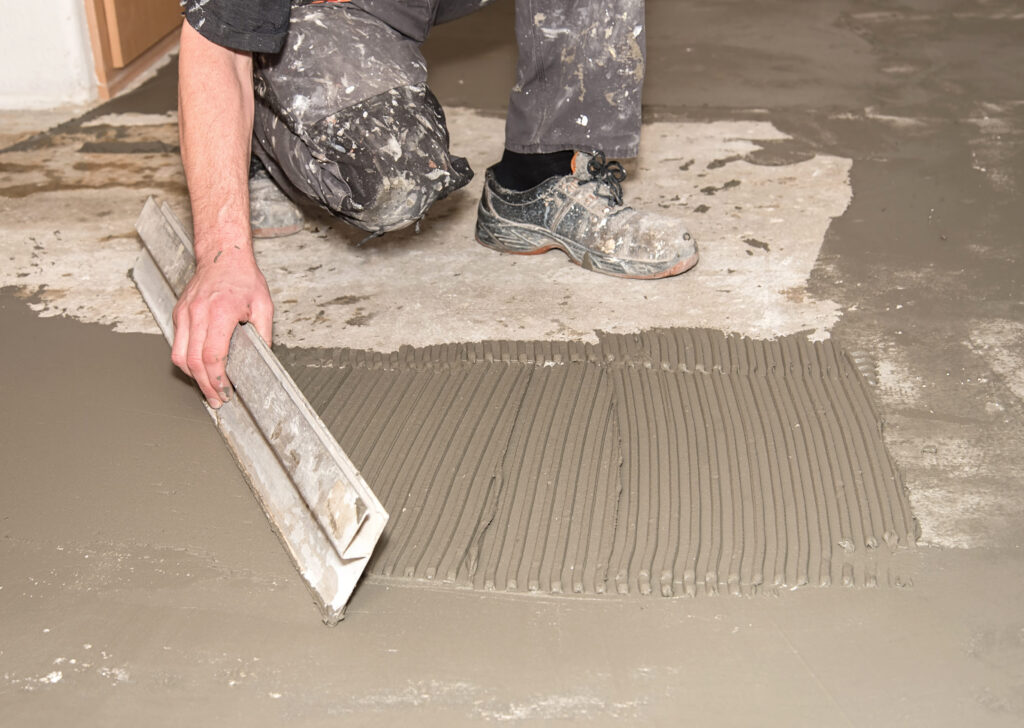
Spread enough thinset on the subfloor to cover an area slightly larger than the first piece of backer board. Comb the thinset with the notched edge of the trowel at a 45-degree angle, making sure the trowel lines go in the same direction. Work quickly while the thinset is wet and set the sheet of backer board in place.
Arrange panels so the ends are staggered. Walk gently on the panels to set them into the thinset, then secure them with screws drilled every six to eight inches. Add a layer of thinset, use fiberglass mesh tape on all the seams, followed by a thin layer of thinset.
Smooth any ridges or high spots and feather the edges of the thinset across each board so the surface is as smooth as possible. Allow the thinset to dry for 24 to 48 hours.
Preparing a Concrete Subfloor
The concrete subfloor must be free of adhesives for the tile to bond properly and increase tile lifespan. Test this by sprinkling water on it. If the water penetrates, a good bond will form, but if the water beads, surface adhesives are present and need to be removed.
The concrete also must have a coarse finish to bond with the thinset. Smooth concrete slabs can be edged or roughed up using chemical or mechanical methods. If there are any existing cracks larger than an eighth of an inch, they’ll need to be patched and filled with a cement patching compound first.
Check that the concrete is level with a straight edge. If there are hollows and valleys, mark them so they can be filled with a self-leveler. The self-leveling compound can be poured over the entire surface if there are several high and low spots, but if it’s just a few spots, treat just those areas.
Removing an Old Floor Before Prepping
Start by taking out the toilet, vanity, and any trim that might be in the way. Plug the sewer pipe with a rag to keep sewer gas from leaking into the room. If removing tile, mask off the doorway and open a window, since removing tile gets really dusty.
Take a hammer and give the old tile a whack. After breaking some up, use a hammer and chisel to remove the tile. Once the tile is gone, use a floor scraper to remove the old thinset.
A mortar bed is common in homes built before 1950. Minor cracks can be repaired and tiled over, but major damage means it has to be removed. The subfloor has to be in good condition, uniform, proper thickness, dry, clear of any residue, and level, with low spots filled using a leveling compound.
Installing an Uncoupling Membrane
A flexible membrane allows for expansion under the tile, gives a strong foundation, and helps protect the subfloor underneath. Start in a corner and roll it out across the floor, cutting it at the wall for the first piece. Cut around pipes using a utility knife, and mark the edges of each run to know where to spread thinset.
Mark numbers on each piece as well as corresponding numbers on the floor. Mix unmodified thinset mortar fairly loose, but not so thin that ridges fall down when applied with a trowel. Apply a thin layer of mortar to the substrate with the flat side to produce solid contact, then comb the mortar using the notched side.
Roll the membrane over the floor, fleece side down, and solidly embed it in the mortar using a wood float. Pull back a corner of the membrane to check full coverage, seeing half the mortar on the floor and half on the fleece. To make the floor completely waterproof, install seam tape on the seams and corners with at least a 2-inch overlap.